After replacing the stereo almost a year ago, the cassette player in the replacement stereo stopped working. I was real bummed about this because I use a cassette player adapter to listen to my iPhone in our van. Time for another repair. Having already gotten my hands on the stereo I had noted that it seemed that the individual components of the stereo (CD changer and cassette player) were separate parts and decided it was possible to swap Toyota Sienna Cassette Player:
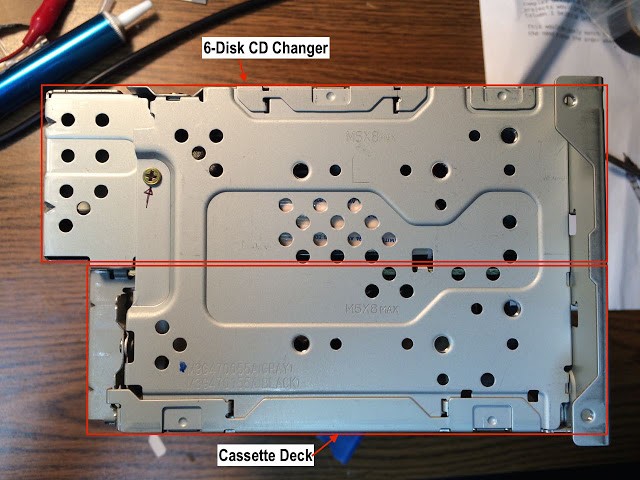 |
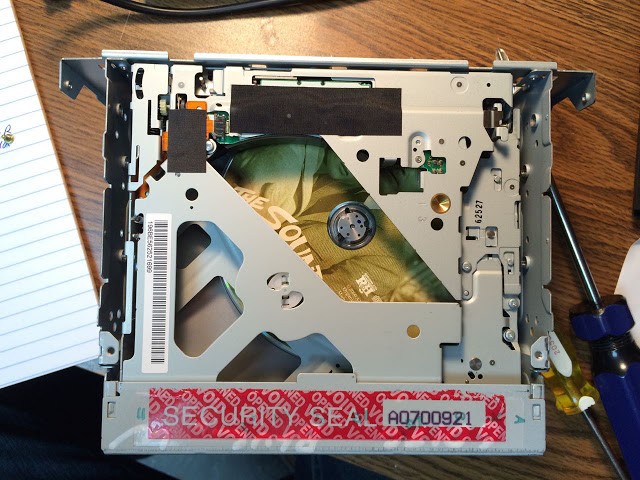
| Modular design–the 6-Disk CD Changer on top and the cassette deck on the bottom |
Because they seemed to be “modules” I wanted to see if I could swap cassette players. I was right and I’ll show you how you can do that too, below…
How to Swap Out the Cassette Player of a 2004-2010 Toyota Sienna
Hardware:
I’ve already written a tutorial on how to change out the entire stereo entertainment center on a 2004-2010 Toyota Sienna and you can visit that article here:
I also wrote an article on how to fix the cassette door if it is not springing back into place for you:
Step 1: Remove the stereo from the van.
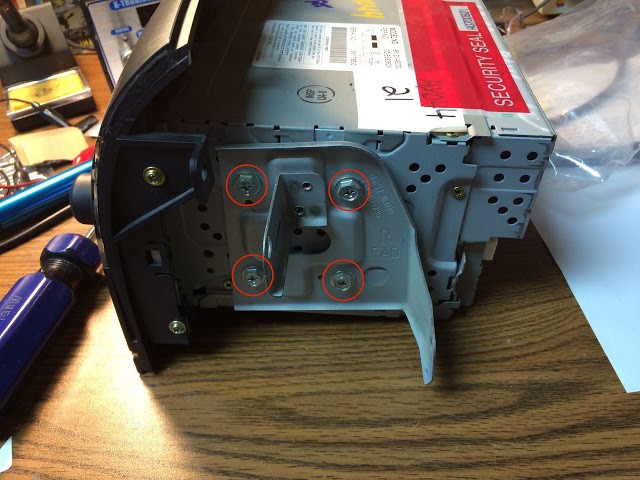
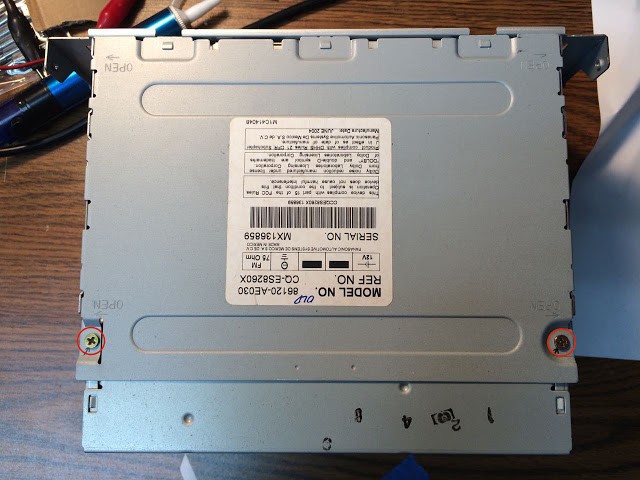
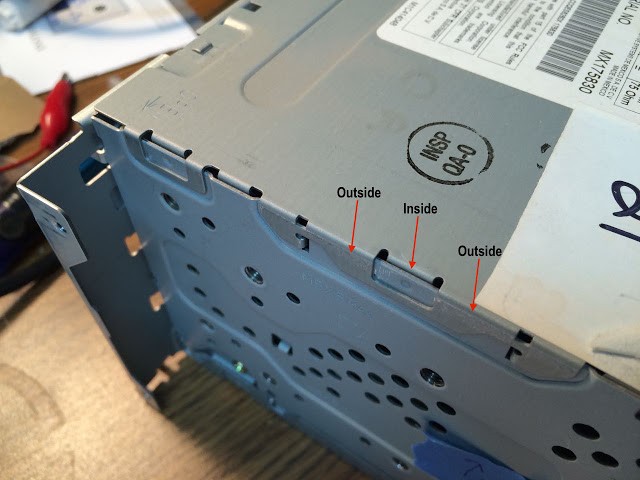
Step 2: Remove the left and right metal mounting brackets from the sides of the stereo.
They have four phillips head/8 mm hex-head screws on each one:
 |
| Mounting bracket screw locations |
Remove the right and left mounting brackets (the right one is a mirror image of the picture above). Each of the brackets is stamped with L or R so you know which one goes where when you reinstall them.
Step 3: Remove the black plastic face of the stereo.
Use a
phillips-head screwdriver
to remove the two screws on either side of the face of the stereo that need to be removed. Here’s what they look like on the right side:
 |
| Stereo Face Screw locations on the right side |
After you have removed the 4 screws you will need to look around the edge of the black plastic and carefully pry up the tabs that latch the black plastic face onto the metal body of the stereo. They can be seen below with the faceplate off:
 |
| Catch tabs that snap the face onto the body of the stereo |
Start with one and gently put pressure pulling the stereo face off and work your way around the outside. Gradually it will begin to come off. There are no cables because the faceplate has two sockets on it that plug directly into the body of the stereo.
Step 4: Remove the two screws on the back of the top metal plate of the stereo.
There are only 2 screws on the top plate, circled below:
 |
| Remove the two screws from the top metal cover |
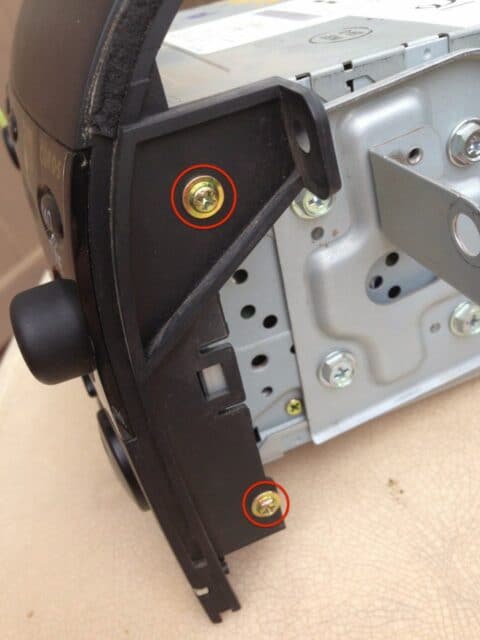
Step 5: Remove the single screw from the left side:
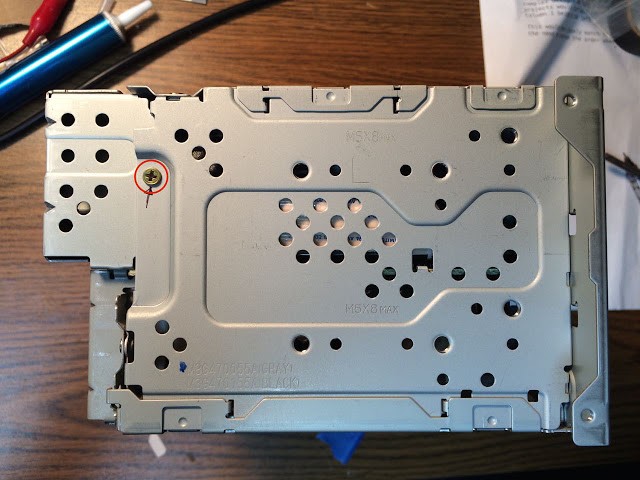 |
| Left side of the stereo only has one screw, remove it |
Step 6: Remove the two screws from the right side:
 |
| Right side has 2 screws, remove them both |
Step 7: Remove the 8 screws from the front face of the stereo that are circled below.
We are only going to be removing the CD changer from the rest of the stereo body, so you can leave the others in there. Remove the four screws circled below:
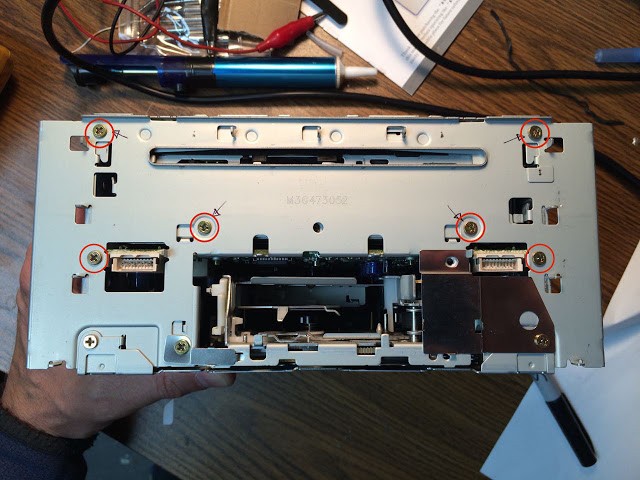 |
| Remove the top 6 screws from the front of the stereo |
Step 8: Remove the two lower outside screws from the back of the stereo:
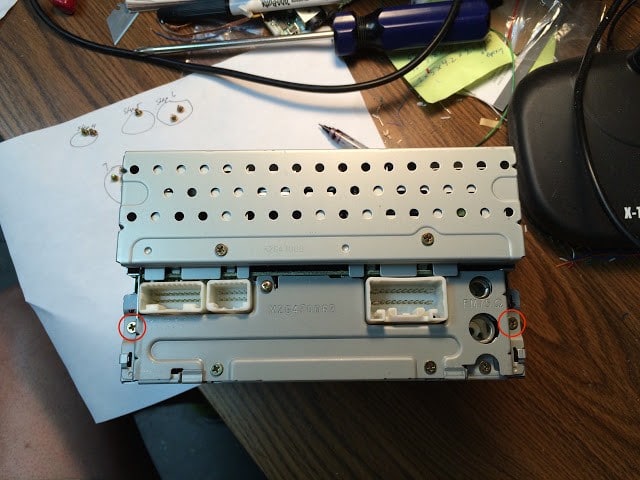 |
| Remove the two lower outside screws from the back |
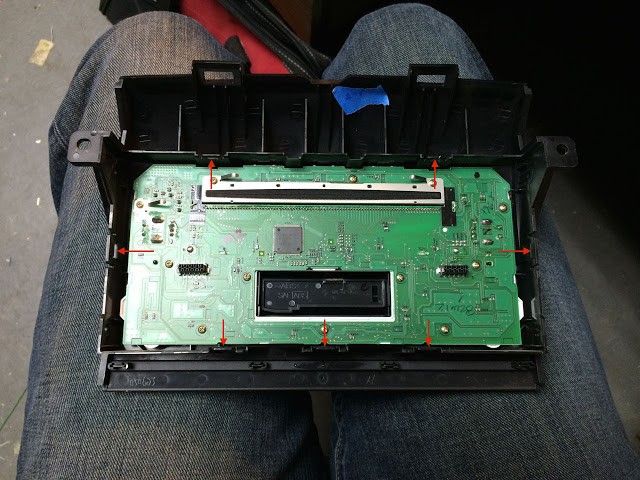
Step 9: Remove the metal cover off the top of the stereo.
To remove it just lift it straight up. This is what you’ll have once you remove it (note that the Sound of Music soundtrack CD is still in the changer):
 |
| Top cover removed |
Step 10: Remove the left and right sides of the assembly.
The sides slide straight up and out of the unit. They “lock” the two parts of the stereo together when they are in place. Carefully lift them both up and out:
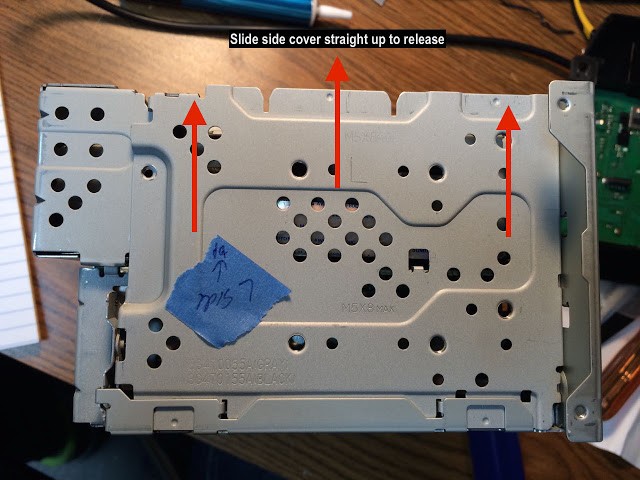 |
| Slide the left side straight up to unlatch it, and then remove it |
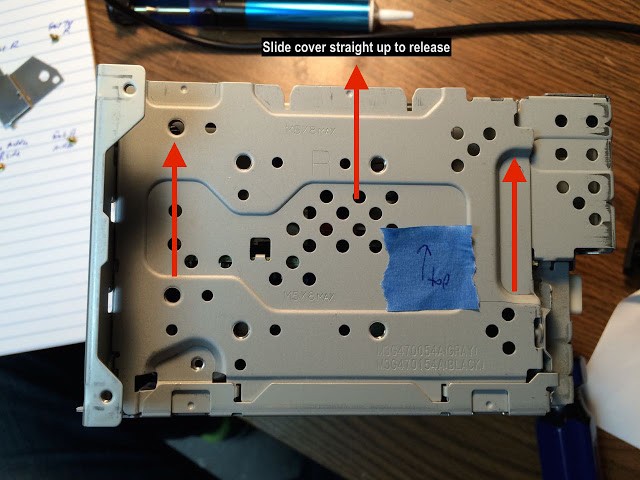 |
| Slide the right side straight up to unlatch it, and then remove it |
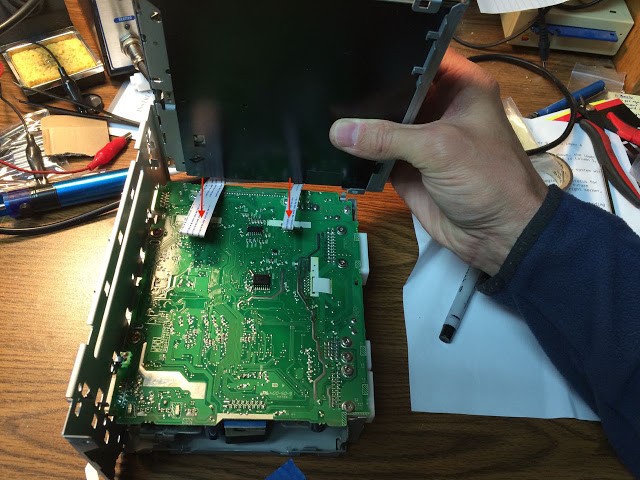
Once you have the sides removed be careful because the CD changer will be loose, except for two cables.
Step 11: Lift the CD changer up and off the assembly and disconnect the ribbon cables.
The ribbon cables are just pushed into a connector and come out easily if you gently pull them straight up as illustrated below:
 |
| Pull the two ribbon cables straight up to release them |
Now you only have the cassette portion of the stereo remaining. I wondered why my cassette player wasn’t working and it didn’t take long to figure it out. When I looked at the bottom of the cassette player I could see a loose belt, which when I pulled it out I could see it was broken:
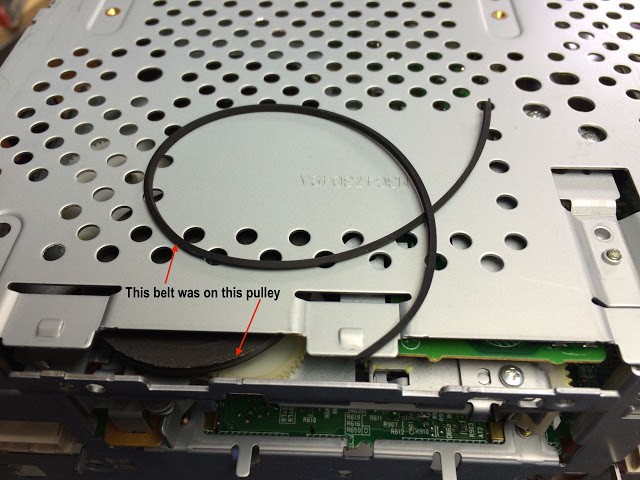 |
| Toyota Sienna Cassette Player with Broken Belt–so that’s why it wasn’t working! |
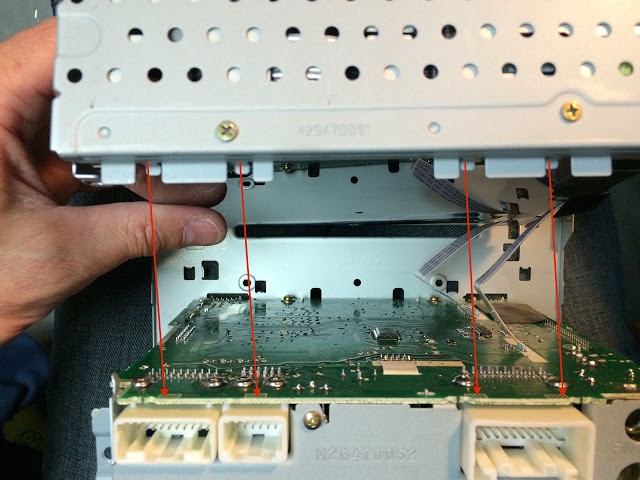
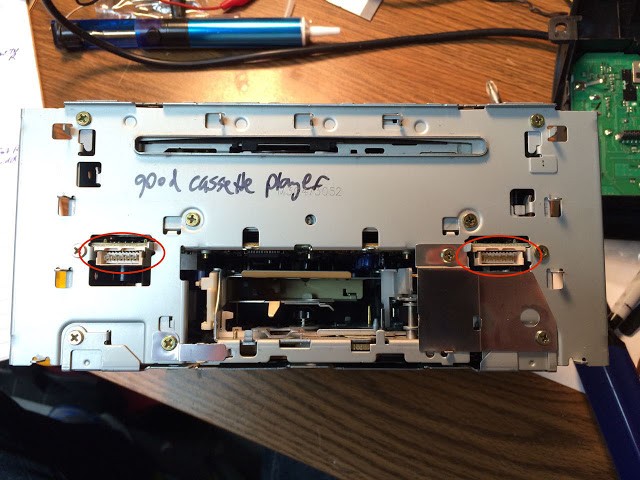
Step 12: Take the good cassette player and install the CD changer on top of it.
If you hold the CD Changer like this you can insert the ribbon cables into the circuit board the easiest. The ribbons are bent at a right angle where they come out of the board. If you hold that ribbon at a right angle and press down on the part that runs parallel with the circuit board they will easily insert into their sockets:
 |
| Push the ribbon cables down into their sockets |
Step 13: Carefully set the CD changer down on top of the circuit board.
There are metal tabs that stick down just off the edge of the circuit board. The sides are what holds everything together so it will just sit on there for now:
 |
| Lower the CD Changer down onto the cassette player |
Step 14: Reinstall the sides.
The sides have tabs that go on either side of the metal plate on the bottom:
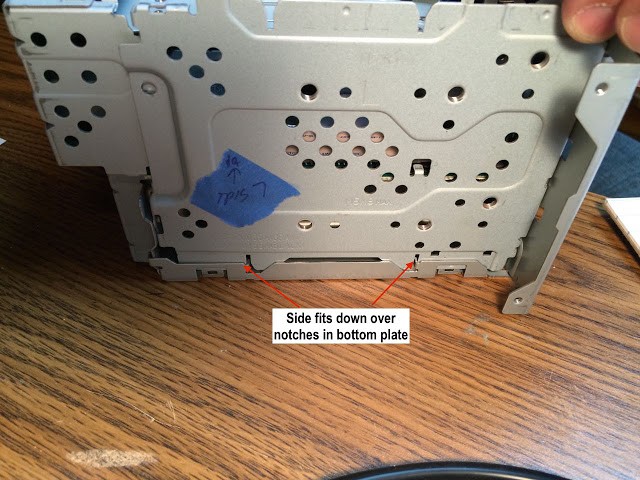 |
| The side fits down over some notches in the bottom |
 |
| The sides “lock” the CD changer in place |
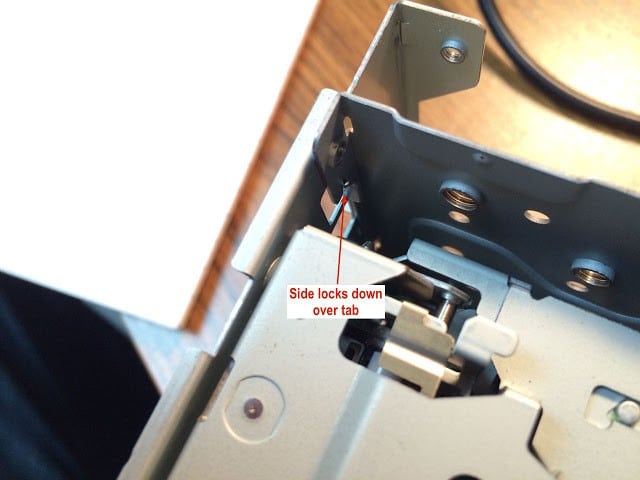
Step 15: Reinstall the top.
The top sits straight down onto the assembly and locks into the sides on both sides exactly the same, as detailed below:
 |
| Details of how the top cover locks into the sides (both sides are the same) |
Step 16: Reinstall the 2 screws on the top panel.
 |
| Reinstall the top two panel screws |
Step 17: Reinstall the one screw on the left side:
 |
| Reinstall the one screw on the left side |
Step 18: Reinstall the two screws on the right side:
Step 22: Reinstall the stereo into the van.
Amazon Associate Disclosure: As an Amazon Associate I earn from qualifying purchases. This means if you click on an affiliate link and purchase the item, I will receive an affiliate commission. The price of the item is the same whether it is an affiliate link or not. Regardless, I only recommend products or services I believe will add value to Share Your Repair readers. By using the affiliate links, you are helping support Share Your Repair, and I genuinely appreciate your support.
Related
(if you wanted to fix your cassette player)


Hi John, Great help to me. However what are your thoughts on purchasing a replacement cassette player? I am not sure where to even look.
I had the electronic part of my stereo go bad and I bought a replacement on ebay for not that much BUT if your cassette player isn’t working I’d be willing to bet it is the belt that has rotted and broken and any used ones will likely be on their way out too. I have written an article on how to replace your belt: How to Replace Cassette Drive Belt on Toyota Sienna 2004-2010. They are very expensive new so ebay or a pick a part junk yard would be where I’d go and I’m to lazy to look in a junk yard so I usually look to ebay.
I used a cassette adapter for many years and endured the poor sound quality. Upgrade to a bluetooth-to-FM modulator, it plugs into a 12 Volt accessory socket. Much improved sound quality and no more tacky looking wires.
Thanks for the comment John. I’ve never had good results with FM transmitters either as when I’ve used them, my radio cannot hold the signal consistently. Wires have been the only tried and true way to play music over my Sienna radio. Hopefully my next van will be smartphone friendly, but until then I’ll be fixing cassette adapters. My replaced one is not working either now and I’m going to replace it with the one I replace the belt on, which I shared about in this article: How to Replace Cassette Drive Belt on Toyota Sienna 2004-2010